Deploy a FastAPI Fullstack Template project to AWS EC2
Thanks to Sebastián Ramírez ‘@tiangolo’ for this full-stack-fastapi-template I’m not a full stack developer(check my bio) or even a developer, yet this template help me a lot to create a full stack machine learning app for a company.
The template is very well documented and relatively easy to understand, but I still wanted to make this post and a companion video for first-timers like me or someone who wants a quick recipe. However, I still encourage you all to at least read the documentation of the template along with this post.
I assume your app work well on your local environment and you want to deploy it on the web. This is my take on deploying a project on EC2. The purpose of post is to document my process for later use and to share with the community.
*All Italics are copied from the original documentation
0- Install Docker Engine on the host computer
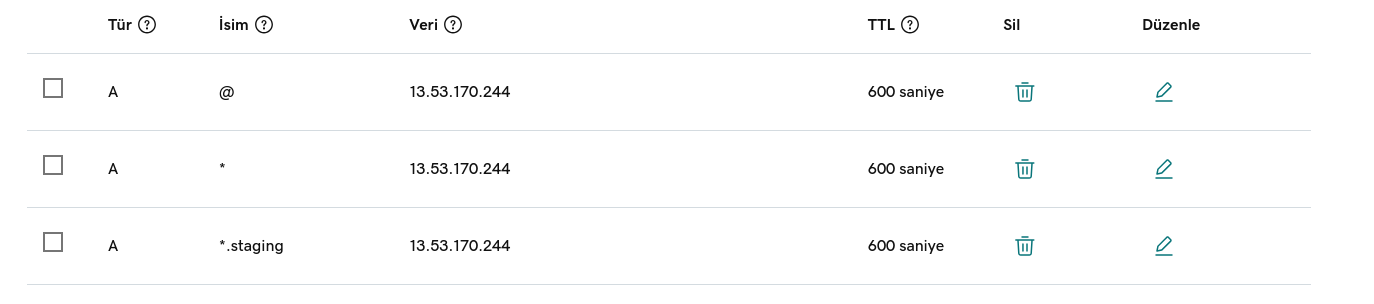
1 - DNS Record
The very first thing I needed to do was configure DNS records for my domain name.. It changes based on your domain name provider but all you need to do is then put your public IP address in the record and that’s all. It just directs your domain name to the public address of your EC2 instance.
In my case, there are three records created as shown in the deployment document
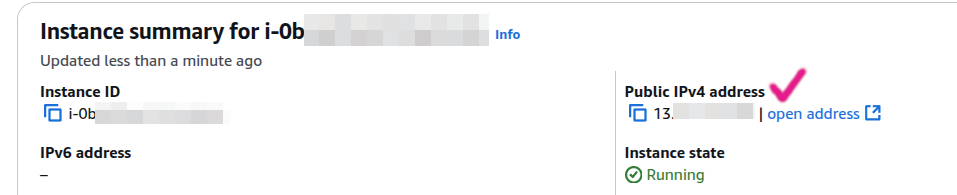
You will find the Public IP address of your instance in AWS here:
- EC2 Service:

- Instances:

Click on the instance id link, then Public IP address will be there:
2 - Connect to Instance
You can connect your instance with one of the methods on the screen: 
I prefer ssh with keypair.pem:
 Then, after successfully connecting:
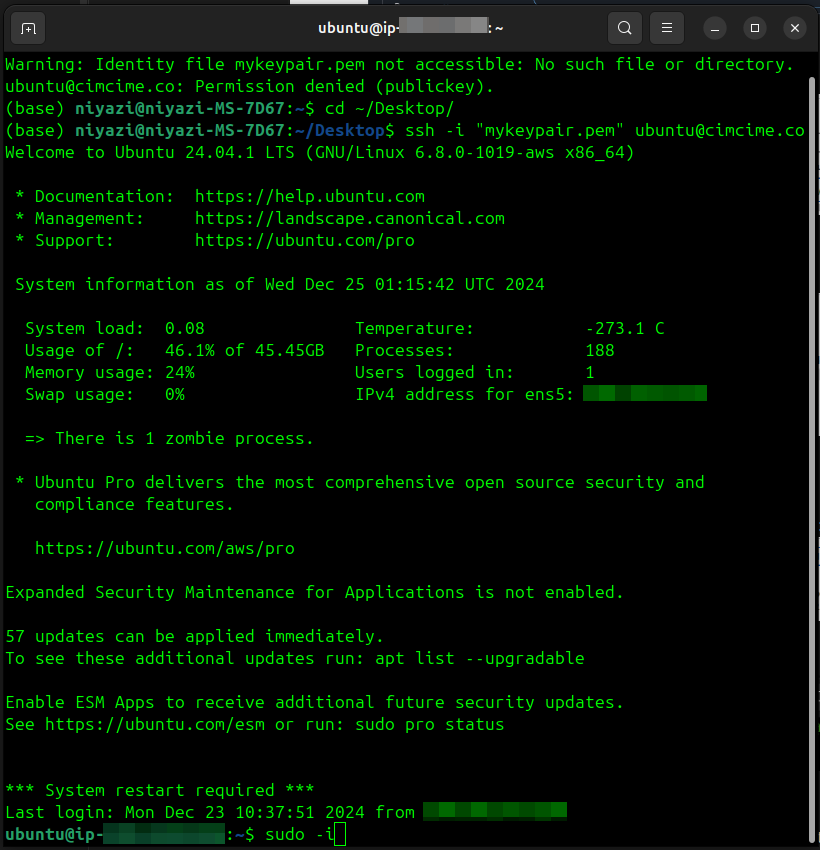
I switched to the root user because I couldn’t find a way to make it run with the default ubuntu user. If anyone knows why or how to do it, please comment below.
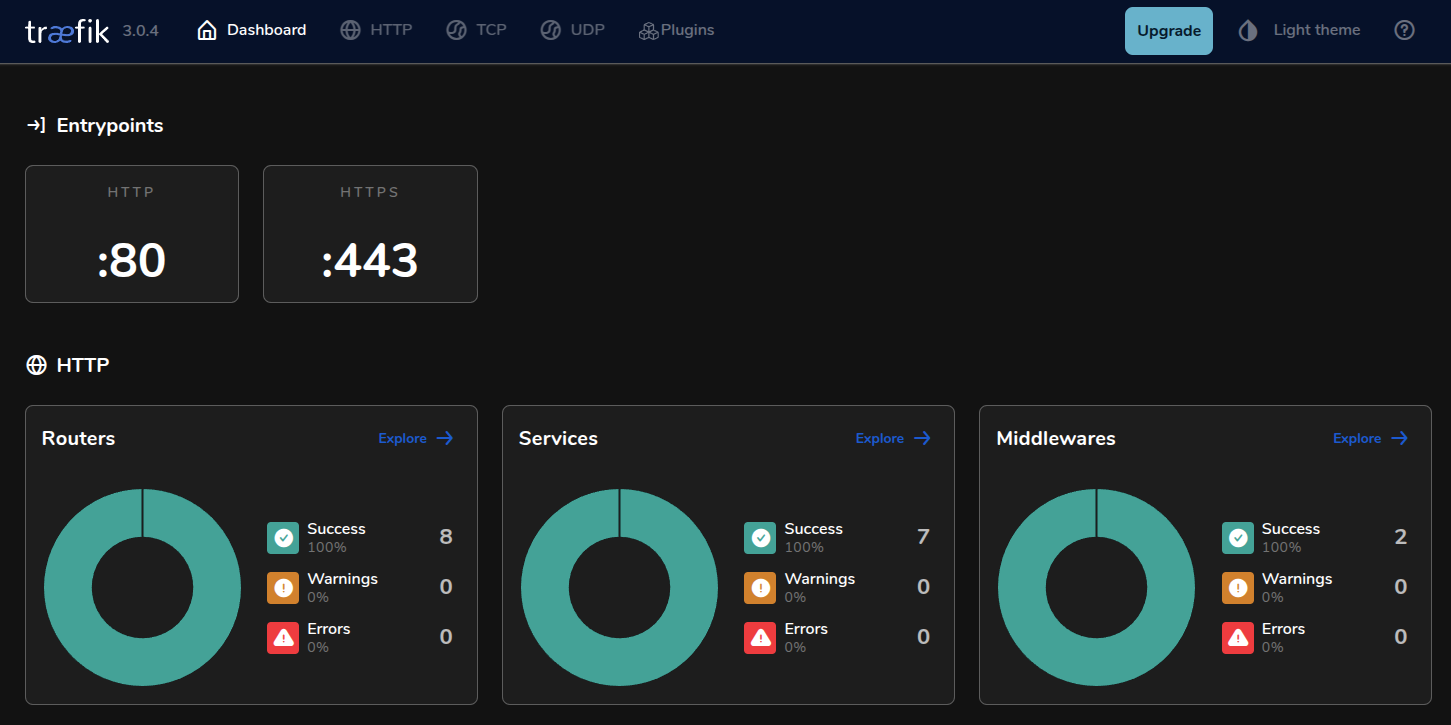
3 - Deploy Traefik
Traefik handles many tasks in this app:
- Reverse Proxy/Load Balancer
- HTTPS/SSL Management
Development Setup(not used for deployment, only for the local development)- Production Configuration (
docker-compose.traefik.yml)
And also it is easy to install it. It is almost the same as the original documentation with a couple of details that you may want to know, so follow the steps (italics are from the original documentation):
Traefik Public Network
This Traefik will expect a Docker “public network” named traefik-public to communicate with your stack(s).
This way, there will be a single public Traefik proxy that handles the communication (HTTP and HTTPS) with the outside world, and then behind that, you could have one or more stacks with different domains, even if they are on the same single server.
To create a Docker “public network” named traefik-public run the following command in your remote server:
docker network create traefik-publicTraefik Environment Variables
Again, the deployment document is correct, but if you close the terminal, all environment variables will be lost. By doing this instead, they will persist on the system. If you need to change them later, you will need to modify the .bashrc file at that time
The Traefik Docker Compose file expects some environment variables to be set in your terminal before starting it. You can do it by running the following commands in your remote server.
- Create the username for HTTP Basic Auth, e.g.:
echo 'export USERNAME=admin' >> /root/.bashrc- Create an environment variable with the password for HTTP Basic Auth, e.g.:
echo 'export PASSWORD=changethis' >> /root/.bashrc- Use openssl to generate the “hashed” version of the password for HTTP Basic Auth and store it in an environment variable:
echo 'export HASHED_PASSWORD=$(openssl passwd -apr1 $PASSWORD)' >> /root/.bashrcTo verify that the hashed password is correct, you can print it:
echo $HASHED_PASSWORD- Create an environment variable with the domain name for your server, e.g.:
echo 'export DOMAIN=fastapi-project.example.com' >> /root/.bashrc- Create an environment variable with the email for Let’s Encrypt, e.g.:
echo 'export EMAIL=admin@example.com' >> /root/.bashrcNote: you need to set a different email, an email @example.com won’t work.
Start the Traefik Docker Compose
Go to the directory where you copied the Traefik Docker Compose file in your remote server:
cd /root/code/traefik-public/Now with the environment variables set and the docker-compose.traefik.yml in place, you can start the Traefik Docker Compose running the following command:
This part didn’t work for me on EC2 (missing repository kind of error)
docker compose -f docker-compose.traefik.yml up -d
So I only added --build at the end then it worked fine:
docker compose -f docker-compose.traefik.yml up -d --buildImportant: If you do not use docker-compose.traefik.yml while building, it just won’t work. So be careful. At this point, you your Traefik network should be accessible. Try to log in to see if it works.
If it doesn’t then check my notes below.
4-Deploy the FastAPI Project
Preparation
Read this first before proceeding: OPTIONAL STEP: For a problem-free deployment on the cloud, you need to manage the database update history that is handled by Alembic in the full-stack-fastapi-template. As you build your app, it is possible that you may have made incremental changes to your local database via alembic without noticing (e.g., by changing models.py). Therefore, you may want to check your version history at beckend/app/alembic/versions and understand how it works. In my case, the version error caused by the addition of columns to non-existent tables which was working fine on the local server Easier solution: I dealt with this problem by deleting all the Alembic version history on my computer, deleting the database container (db), then recreating it from scratch in the local development environment after the development stage. Test it locally if it works fine, then put the final copy of the project on EC2, then deploy that final version.
to delete everything under beckend/app/alembic/versions :
- `alembic revision --autogenerate -m "all changes in one go."`
- `alembic upgrade head`
Environment Variables
You need to set some environment variables first.
Set the ENVIRONMENT, by default local (for development), but when deploying to a server you would put something like staging or production:
The only difference is writing all of them to the file.
echo 'export ENVIRONMENT=production' >> /root/.bashrcSet the DOMAIN, by default localhost (for development), but when deploying you would use your own domain, for example:
echo 'export DOMAIN=fastapi-project.example.com' >> /root/.bashrcFor all the below I use the method like above
You can set several variables, like:
PROJECT_NAME: The name of the project, used in the API for the docs and emails.STACK_NAME: The name of the stack used for Docker Compose labels and project name, this should be different forstaging,production, etc. You could use the same domain replacing dots with dashes, e.g.fastapi-project-example-comandstaging-fastapi-project-example-com.BACKEND_CORS_ORIGINS: A list of allowed CORS origins separated by commas.SECRET_KEY: The secret key for the FastAPI project, used to sign tokens.FIRST_SUPERUSER: The email of the first superuser, this superuser will be the one that can create new users.FIRST_SUPERUSER_PASSWORD: The password of the first superuser.SMTP_HOST: The SMTP server host to send emails, this would come from your email provider (E.g. Mailgun, Sparkpost, Sendgrid, etc).SMTP_USER: The SMTP server user to send emails.SMTP_PASSWORD: The SMTP server password to send emails.EMAILS_FROM_EMAIL: The email account to send emails from.POSTGRES_SERVER: The hostname of the PostgreSQL server. You can leave the default ofdb, provided by the same Docker Compose. You normally wouldn’t need to change this unless you are using a third-party provider.POSTGRES_PORT: The port of the PostgreSQL server. You can leave the default. You normally wouldn’t need to change this unless you are using a third-party provider.POSTGRES_PASSWORD: The Postgres password.POSTGRES_USER: The Postgres user, you can leave the default.POSTGRES_DB: The database name to use for this application. You can leave the default ofapp.SENTRY_DSN: The DSN for Sentry, if you are using it.
Deploy The Project
Ensure that the entire app is under /root/code/my-full-stack-app cd /root/code/my-full-stack-app Again, the only difference from the original documentation is adding --build at the end. docker compose -f docker-compose.yml up -d --build Important: It is crucial to explicitly use docker-compose.yml in the Docker Compose command. Otherwise, docker-compose.override.yml will kick in, and you won’t deploy your app properly
NOTES:
- Learn how to clean the instance of previous failed attempts.
- it is very annoying to see how your volumes can become full quickly.
- For a clean start remove everything related to Traefik:
docker-compose -f docker-compose.traefik.yml downdocker network rm traefik-publicdocker system prune -f- to check if there is anything left on the host environment
docker ps,docker network ls,docker volume ls- remove if there was anything left.
- verify by running:
docker ps | grep traefik
- if necessary do this for the app part too.
- it is very annoying to see how your volumes can become full quickly.